Global Japanese Sushi Rolls
Highlighted under: World Food | Dishes From Everywhere
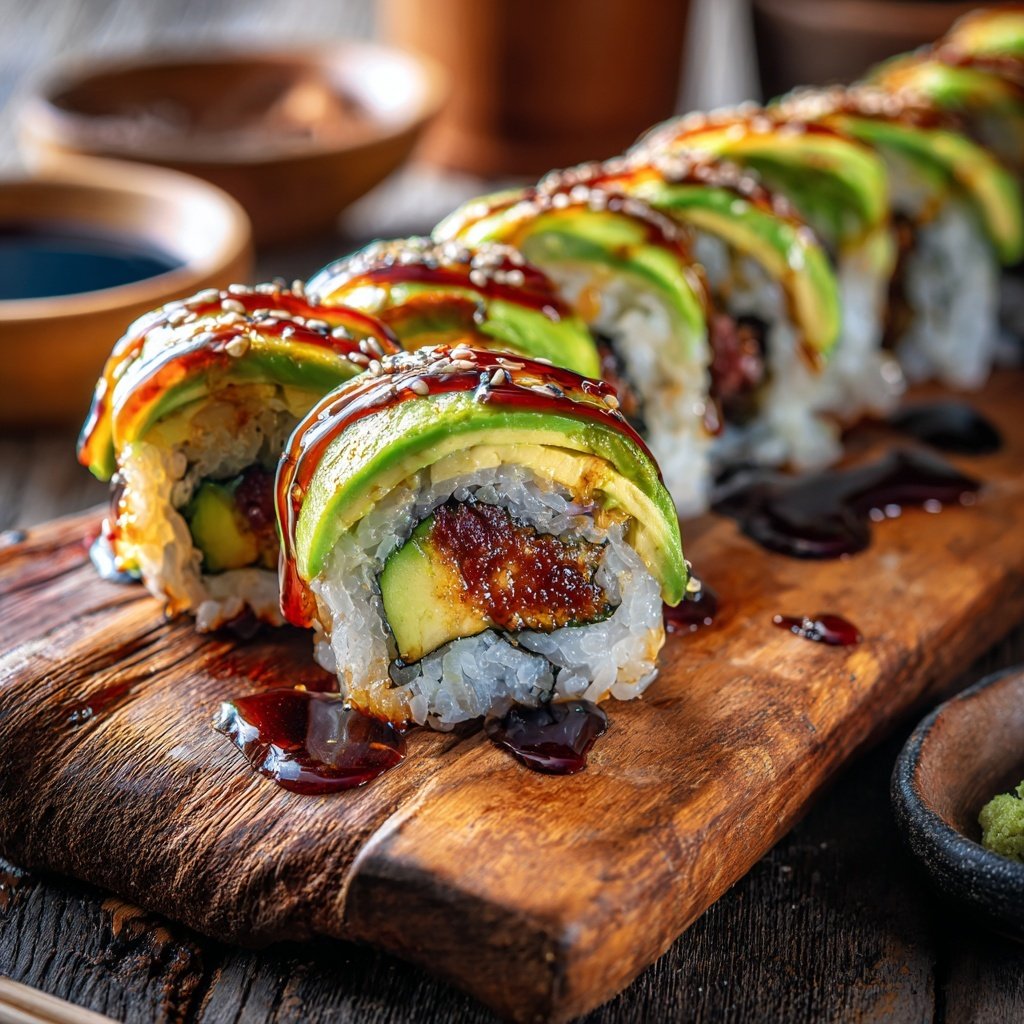
I absolutely love making sushi rolls at home, and my Global Japanese Sushi Rolls have become a favorite in my household. Combining fresh ingredients with flavorful sauces, each roll tells a unique story of global influence. Whether it's the classic California roll or a spicy tuna twist, the versatility of these sushi rolls allows me to cater to everyone’s palate. It’s a fun activity for family gatherings, and I find joy in exploring different flavor combinations that surprise and delight my taste buds.

Making sushi at home was something I initially found daunting, but I soon learned it's all about preparation and passion. I experimented with various fillings and rice types to find the perfect balance for my Global Japanese Sushi Rolls. One tip I discovered is to use freshly cooked rice, as its stickiness holds the rolls together much better, providing both texture and flavor.
As I continued to refine my technique, I began incorporating global flavors, allowing me to create rolls that celebrate diverse ingredients. For instance, a mango avocado combination adds a refreshing twist that contrasts wonderfully with traditional sushi tastes. Don't be afraid to get creative with your fillings; the possibilities are endless!
Why You'll Love These Rolls
- Fresh ingredients that burst with flavor
- Creative fusion of global tastes
- Fun and interactive meal for gatherings
Mastering Sushi Rice
The quality of sushi rice is paramount in creating delicious sushi rolls. When rinsing the rice, be thorough; it should be submerged and swirled until the water is clear, which removes excess starch and prevents the rice from becoming gummy. The ideal sushi rice should be sticky enough to hold together but not mushy. When cooking, the rice should be brought to a boil, then simmered on low for 15-20 minutes. Letting it rest afterward ensures the texture is just right.
While mixing the rice vinegar with sugar and salt, keep the heat low; overstirring or cooking it at high temperatures can caramelize the sugar, affecting the flavor balance. The vinegar mixture should blend seamlessly into the rice, giving it a subtle sweetness and tang, which enhances the overall flavor of the sushi rolls. Spread the seasoned rice out on a large tray and fan it slightly to cool and achieve a glossy sheen—this step also helps achieve ideal texture and flavor.
Rolling Techniques
When rolling sushi, maintaining even pressure is key to achieving the perfect shape. Use a bamboo mat to guide the nori while rolling, starting from the bottom and holding back the fillings. As you roll, ensure that the ingredients stay centered and don’t overflow, which can happen with too much filling. If the nori is too dry, it may crack; a slight mist with water can help it remain pliable as you roll.
If you’re making multiple rolls, plan the order of your fillings strategically. For example, using heavier ingredients like shrimp or crab towards the center provides a solid base, while delicate items like avocado and cucumber can rest on top for visual appeal. For vegetarian rolls, try using seasoned tofu or marinated vegetables to maintain flavor and interest. The thickness of your rolls can vary depending on how tightly you compress them; experiment to find your preferred thickness.
Serving Suggestions and Variations
For a vibrant presentation, serve sushi rolls on a wooden sushi board with colorful dipping sauces. Accompanying garnishes like pickled ginger and wasabi not only enhance the experience but also aid digestion. You can elevate the experience further by arranging the rolls in various shapes or layers, creating a beautiful platter for gatherings—you can even use edible flowers for a decorative touch!
To expand your sushi roll repertoire, consider experimenting with different types of nori, such as seasoned or flavored varieties. Substituting traditional fillings with grilled vegetables or even fruits like strawberries can create a unique twist. For a bolder kick, incorporate spicy tuna or smoked salmon. These adaptations allow you to cater to different dietary needs and preferences while keeping the excitement alive in your sushi-making adventures.
Ingredients
Ingredients
Sushi Rice
- 2 cups sushi rice
- 2 1/2 cups water
- 1/4 cup rice vinegar
- 2 tablespoons sugar
- 1 teaspoon salt
Fillings
- 1 avocado, sliced
- 1 cucumber, julienned
- 1/2 pound cooked shrimp or crab
- 1/2 mango, sliced
- Spicy mayonnaise (optional)
Rolling Essentials
- Nori sheets
- Soy sauce for serving
- Sesame seeds for garnish
Instructions
Instructions
Prepare the Sushi Rice
Rinse the sushi rice under cold water until the water runs clear. Combine rice and water in a rice cooker and cook according to the manufacturer's instructions. Once cooked, let it sit for 10 minutes. In a small saucepan, heat rice vinegar, sugar, and salt over low heat until dissolved. Gently fold this mixture into the rice, allowing it to cool completely.
Set Up Your Rolling Station
Place the bamboo sushi mat on a clean surface. Lay a sheet of nori on the mat, shiny side down. Have your fillings prepared and within reach.
Roll Your Sushi
With wet hands, take a handful of sushi rice and evenly spread it over the nori, leaving about an inch at the top. Layer your fillings across the center of the rice. Use the mat to roll the nori away from you, applying gentle pressure to form a tight roll. Seal the edge of the nori with a bit of water.
Cut and Serve
Using a sharp, damp knife, slice the roll into 6-8 pieces. Repeat the process for the remaining ingredients. Serve with soy sauce and garnish with sesame seeds. Enjoy!
Pro Tips
- Experiment with different fillings and sauces to create your own signature sushi rolls. Be sure to use fresh ingredients to enhance the overall flavor.
Making Ahead and Storage
Sushi rolls are best enjoyed fresh, but you can prepare components in advance for a quicker assembly. The sushi rice can be made a few hours ahead of rolling; just store it in an airtight container to keep moisture in. Make sure to let the rice cool completely to avoid condensation, which can lead to soggy nori when assembled. Cut fillings should be stored separately in the refrigerator to maintain freshness and texture.
If you have leftover sushi rolls, store them in a tightly sealed container in the refrigerator for up to a day. To keep the nori from getting too soft, wrap each roll lightly in plastic wrap before placing it in the container. Reheating is not recommended, but if you need to serve leftover rolls, you can briefly microwave them for about 10 seconds to soften the rice slightly without cooking it.
Troubleshooting Common Issues
If your sushi rice is too sticky or falls apart, it may have been overcooked or not rinsed well. Make sure to properly rinse your rice until the water runs clear and follow cooking instructions carefully. If the rice seems too dry, a light sprinkle of water mixed with rice vinegar can help rehydrate it just before rolling without compromising taste.
In cases where your nori tears while rolling, try wetting your hands and the edges of the nori to create a smoother seal. If the rolls aren’t holding together, you might need to adjust the amount of rice or be more diligent about compression during the rolling process—don’t hesitate to practice a few times to get the feel of it!
Flavor Pairings for Dipping Sauces
While soy sauce is a classic accompaniment for sushi, consider preparing a wasabi-soy blend by mixing a small amount of wasabi with soy sauce for an extra kick. This combination enhances the flavors of the fish and seafood without overwhelming the palate. Alternatively, a sweet soy glaze or a spicy mayo dip can be delightful additions, providing contrast and depth to each bite.
Creating your own dipping sauces can elevate your sushi rolls to restaurant-quality status. For a tangy twist, mix rice vinegar, soy sauce, and a pinch of sugar. If you love heat, a sriracha and mayonnaise blend will complement the rolls beautifully, especially if you're adding spicy ingredients. Experimenting with these sauces adds a personalized touch to your sushi experience and can cater to varied tastes in your group.
Questions About Recipes
→ Can I use brown rice instead of sushi rice?
Yes, but brown rice will have a different texture and taste. It may also require additional cooking time.
→ How can I make sushi vegan?
You can substitute traditional fillings with avocado, cucumber, bell peppers, or tofu. There are plenty of delicious vegan options!
→ What is the best way to store leftover sushi?
Wrap sushi in plastic wrap and refrigerate. It's best eaten within a day for optimal freshness.
→ Can I prepare sushi rice ahead of time?
Yes, you can cook sushi rice a few hours in advance and let it cool. Just be sure to keep it covered to retain moisture.
Global Japanese Sushi Rolls
Created by: The Ursulabakes Team
Recipe Type: World Food | Dishes From Everywhere
Skill Level: Intermediate
Final Quantity: 4 rolls
What You'll Need
Sushi Rice
- 2 cups sushi rice
- 2 1/2 cups water
- 1/4 cup rice vinegar
- 2 tablespoons sugar
- 1 teaspoon salt
Fillings
- 1 avocado, sliced
- 1 cucumber, julienned
- 1/2 pound cooked shrimp or crab
- 1/2 mango, sliced
- Spicy mayonnaise (optional)
Rolling Essentials
- Nori sheets
- Soy sauce for serving
- Sesame seeds for garnish
How-To Steps
Rinse the sushi rice under cold water until the water runs clear. Combine rice and water in a rice cooker and cook according to the manufacturer's instructions. Once cooked, let it sit for 10 minutes. In a small saucepan, heat rice vinegar, sugar, and salt over low heat until dissolved. Gently fold this mixture into the rice, allowing it to cool completely.
Place the bamboo sushi mat on a clean surface. Lay a sheet of nori on the mat, shiny side down. Have your fillings prepared and within reach.
With wet hands, take a handful of sushi rice and evenly spread it over the nori, leaving about an inch at the top. Layer your fillings across the center of the rice. Use the mat to roll the nori away from you, applying gentle pressure to form a tight roll. Seal the edge of the nori with a bit of water.
Using a sharp, damp knife, slice the roll into 6-8 pieces. Repeat the process for the remaining ingredients. Serve with soy sauce and garnish with sesame seeds. Enjoy!
Extra Tips
- Experiment with different fillings and sauces to create your own signature sushi rolls. Be sure to use fresh ingredients to enhance the overall flavor.
Nutritional Breakdown (Per Serving)
- Calories: 480 kcal
- Total Fat: 10g
- Saturated Fat: 1g
- Cholesterol: 80mg
- Sodium: 500mg
- Total Carbohydrates: 72g
- Dietary Fiber: 4g
- Sugars: 5g
- Protein: 15g